eiabea/tempea-api repository overview
Tempea


Motivation
The thermostat in our flat was pretty basic, so I decided to build my own one based on a Raspberry Pi, Docker, InfluxDB, node.js, a small PCB with a relay to control a gas boiler and a temperature sensor.
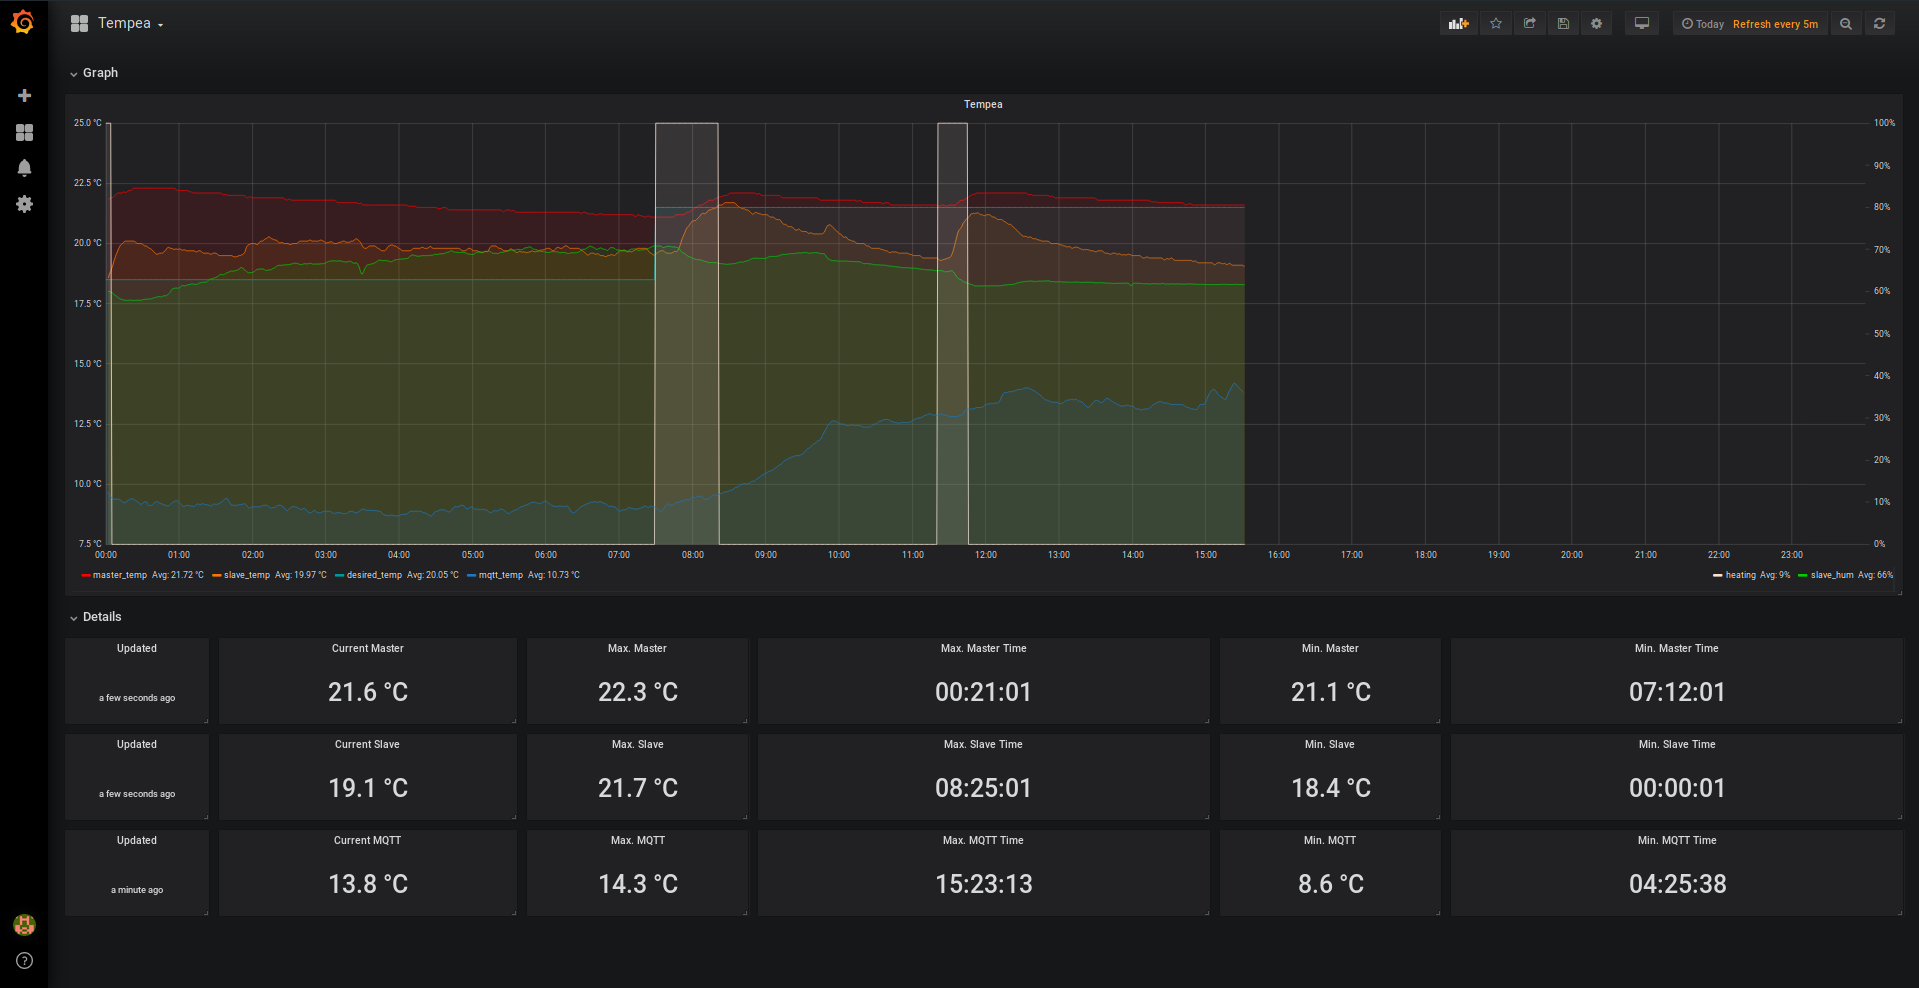
Grafana is used to plot temperature and heating period graphs.
After some research I stumbled over the great idea to use Google Calender to set a desired temperature. This reduced the complexity of the node application drastically and made it obsolete to expose the Raspberry Pi to the internet for remote management.
Table of Contents
Setup
System
Raspbian
-
Get the latest lite version of raspbian from the official download page
-
Unzip the image
unzip 2018-11-13-raspbian-stretch-lite.zip
-
Insert your sd card into your PC
-
Run the following command to find out the name of your sd card
dmesg
- Flash the previously downloaded image using dd (may requires root permissions) to your sd card
dd if=/home/eiabea/2018-11-13-raspbian-stretch-lite.img of=/dev/mmcblk0 bs=4M && sync
-
Wait until the command has finished successfully
-
Remove and reinsert your sd card (to initialize your sd card again)
-
To set a static ip address open up the etc/network/interfaces file on your sd card and paste the following content (may requires root permissions)
# interfaces(5) file used by ifup(8) and ifdown(8)

# Please note that this file is written to be used with dhcpcd
# For static IP, consult /etc/dhcpcd.conf and 'man dhcpcd.conf'

# Include files from /etc/network/interfaces.d:
source-directory /etc/network/interfaces.d

auto lo
iface lo inet loopback

iface eth0 inet manual
- Open up the etc/dhcpcd.conf file and add the following content at the end of the file. Edit all values according to your network (may requires root permissions)
interface eth0
static ip_address=192.168.0.8/24
static routers=192.168.0.1
static domain_name_servers=192.168.0.1 8.8.8.8 4.2.2.1
- Create a blank file on the boot partition named ssh to enable ssh
touch ssh
-
Unmount and remove your sd card from your PC and insert it into your Raspberry Pi
-
Connect a ethernet cable between your router and the Raspberry Pi
-
Connect the power supply to boot up your Raspberry Pi
-
Login via ssh (username: pi, password: raspberry)
- Update the system to the latest version
sudo apt update && sudo apt upgrade -y
Docker
- Run the following command to install docker
curl -sSL https://get.docker.com | sh
- Add the pi user to the docker group to start container as user
sudo usermod -aG docker pi
-
Log out and in again to gain access to docker
-
Verify the correct installation of docker
docker ps
- Install docker-compose
sudo apt install -y python-pip
sudo pip install docker-compose
- Verify the correct installation of docker-compose
docker-compose version
Hardware
Breadboard
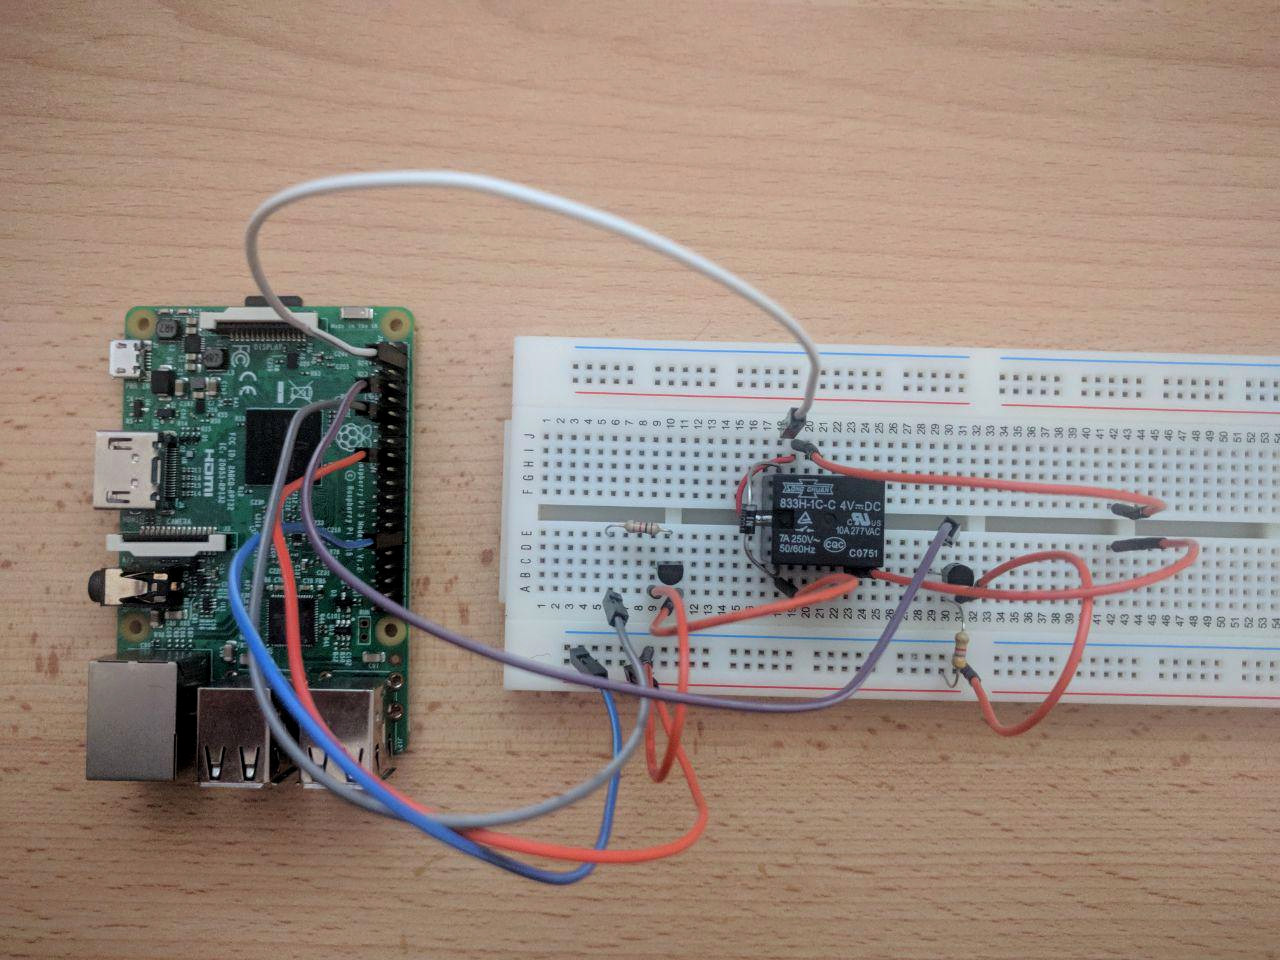
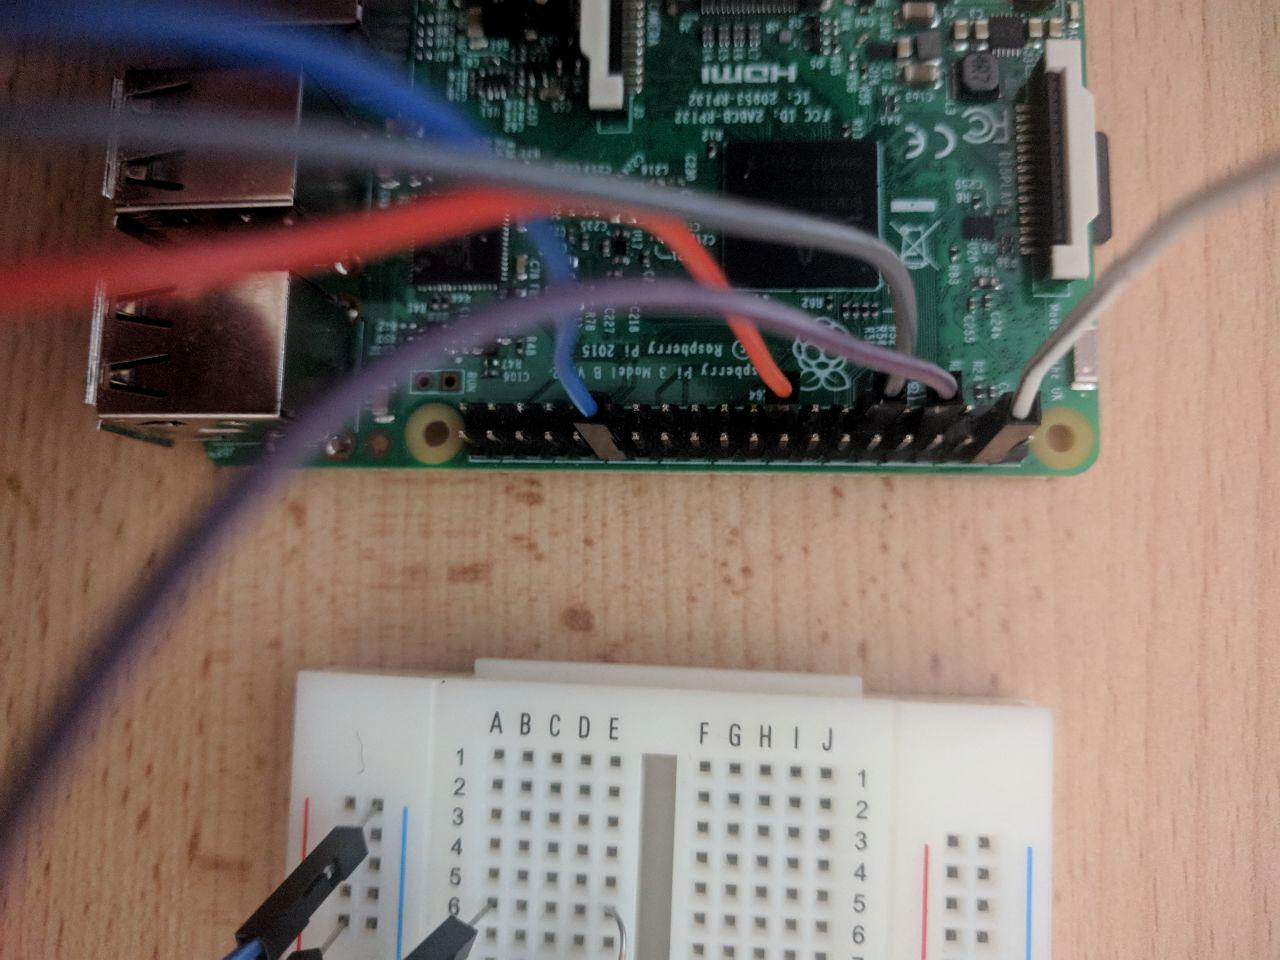
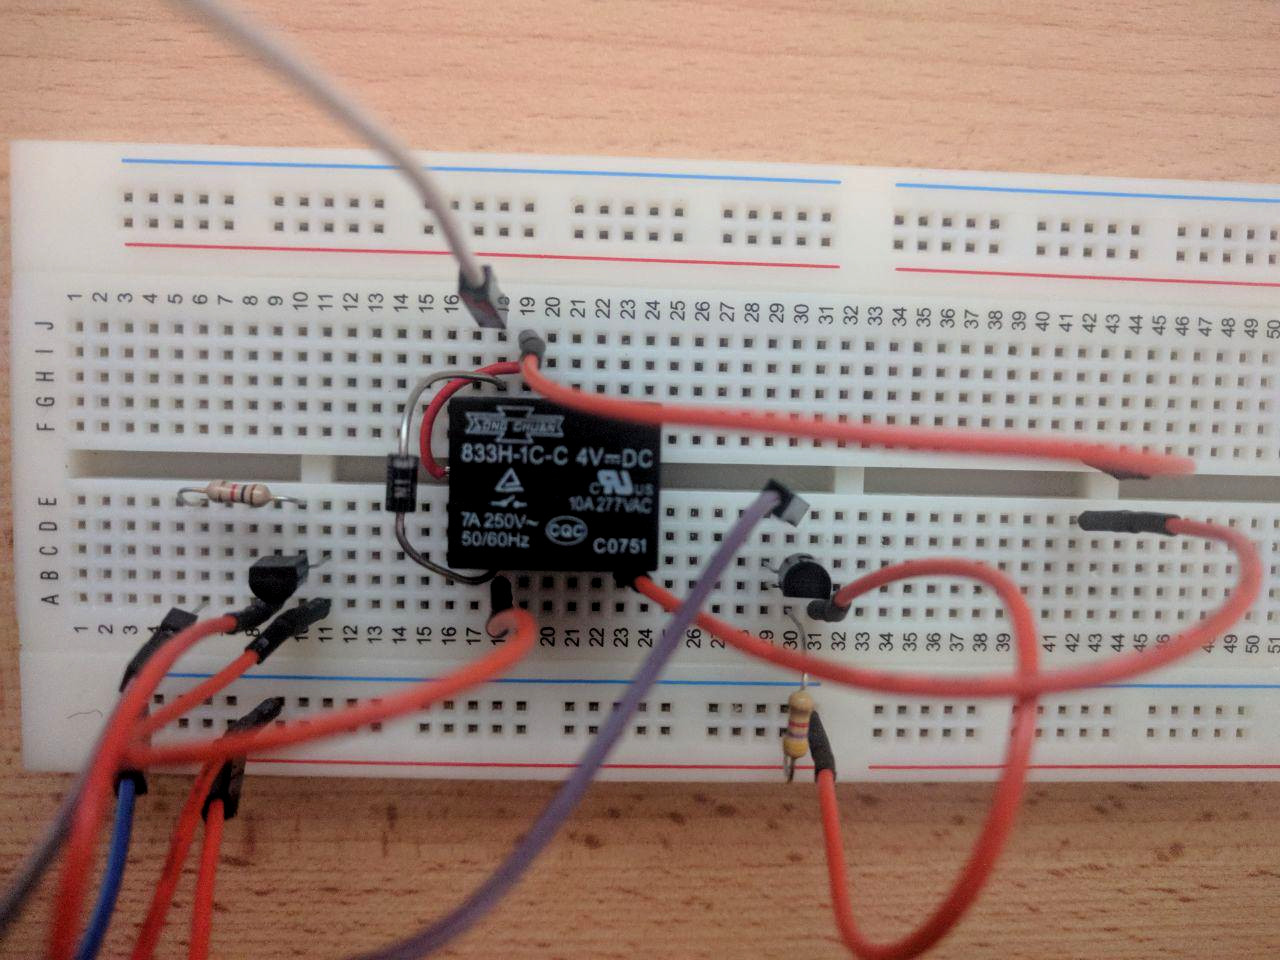
For running tempea the Raspberry Pi needs to be connected to some peripherals. In this case, a transistor driven relay is used to turn on a gas boiler and a digital temperature sensor with a one wire interface (DS18B20)
Schematics
The schematics for this step can be found here and are created with Fritzing
Parts
- Breadboard
- Wires
- Resistors (1kOhm, 4,7kOhm)
- 1N4004
- DS18B20
- 833H-1C-C
- BC547
The following images in combination with the schematics should make it easy to build up the circuit. Please note, that my relay had a different pinout than shown in the schematic. Check the data sheet of your relay to wire it up correctly. The relay should work as a closer, so if no power is supplied the outgoing pins must not be connected!
Software
OneWire
In order to get data from the DS18B20, the one wire interface of the Raspberry Pi has to be enabled. Open up /boot/config.txt and add the following lines at the end of the file
# OneWire
dtoverlay=w1-gpio,gpiopin=4,pullup=on
After rebooting, it should be able to see the connected sensor
$ ls /sys/bus/w1/devices/
10-00080278b776  w1_bus_master1
Take a note of the name (e.g. 10-00080278b776) of the slave, it will be needed in the following steps
Obtaining Google Calendar Service JSON
-
Login at Google Developer Console
-
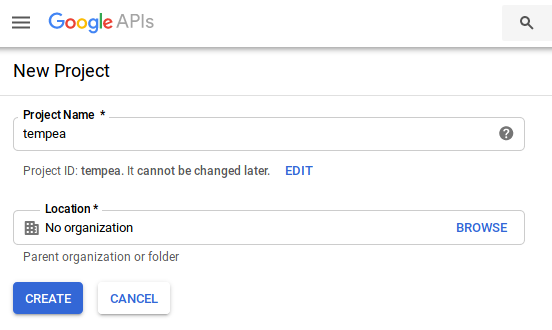
Create a new project (e.g.: tempea)
-
Click "Enable APIs and Services"
-
Search for "Google Calendar API" and enable it
-
In the side menu click on "IAM & admin" - "Service accounts"
-
Create a new service account (leave optional fields empty)
-
Create a new JSON key for your service account
Service json file (example)
{
  "type": "service_account",
  "project_id": "tempea",
  "private_key_id": "bbc5f5b4422b7848d47cf2a4221c47ec1718f071",
  "private_key": "-----BEGIN PRIVATE KEY-----\nMIIEDAI=\n-----END PRIVATE KEY-----\n",
  "client_email": "[email protected]",
  "client_id": "108968564556464390537",
  "auth_uri": "https://accounts.google.com/o/oauth2/auth",
  "token_uri": "https://oauth2.googleapis.com/token",
  "auth_provider_x509_cert_url": "https://www.googleapis.com/oauth2/v1/certs",
  "client_x509_cert_url": "https://www.googleapis.com/robot/v1/metadata/x509/tempea%40tempea.iam.gserviceaccount.com"
}
Setup tempea
- Connect to the Raspberry Pi via ssh (username: pi, password: raspberry)
- Create tempea directory
mkdir tempea
- Change into the tempea directory
cd tempea
- Create secrets directory and copy/paste your google-service.json content into a new file called tempea-service.json
mkdir secrets
nano secrets/tempea-service.json
- Download the latest docker-compose-production.yml
wget -O docker-compose.yml https://raw.githubusercontent.com/eiabea/tempea-api/master/docker-compose-production.yml
- Open up the docker-compose.yml file and change the environment section of the tempea service according to your needs/setup
environment:
  # Google
  GOOGLE_SERVICE_ACCOUNT_JSON: "tempea-service.json"  # Name of the google service json file
  GOOGLE_CALENDAR_ID: "[email protected]"          # Email address of your service account
  # Modules
  ROUTING_MODULE_HOST: "0.0.0.0"                      # Host option of the node application
  ROUTING_MODULE_PORT: "3000"                         # Port definition
  # Database
  #  Influx
  INFLUX_HOST: "influx"
  INFLUX_PORT: "8086"
  INFLUX_DB: "temp"
  # Hardware
  SENSOR_ID: "10-00080278b776"                        # Address of your OneWire sensor noted in the "OneWire"-section
  # Slave
  SLAVE_ENABLED: "true"                               # Enable/Disable slave feature
  SLAVE_HOST: "192.168.0.7"                           # Host of the slave
  SLAVE_PORT: "3000"                                  # Port of the slave
  SLAVE_ENDPOINT: "/v1/status"                        # Endpoint of the slave to get data from
  # Celius (float)
  MAX_TEMP: "25"                                      # Maximal temperature accepted
  MIN_TEMP: "15"                                      # Minimal temperature accepted
  OVERSHOOT_TEMP: "0.5"                               # How much degrees should be "overheated"
  # Minutes
  FETCHING_INTERVAL: "1"                              # How often should the calendar be checked
- Download the latest telegraf.conf
wget https://raw.githubusercontent.com/eiabea/tempea-api/master/telegraf.conf
Setup calendar
-
Login to your Google Calendar
-
Add the calendar of your service account (e.g.: [email protected])
-
Create a new event in this calendar with the desired temperature in the summary (e.g.: 21.5)
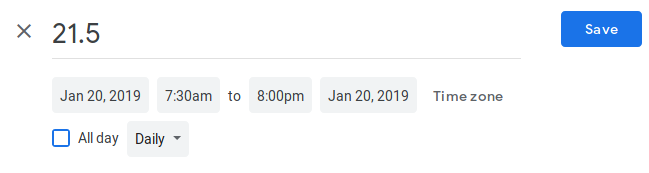
- Create more events in the same manner in order to set different temperatures on different dates/time. Keep in mind, that all days should be covered by a specific event, otherwise tempea will fallback to the MIN_TEMP for this period.
Start
Tempea can be started by simply run the following command in the project directory
docker-compose up -d
This command starts all necessary containers in background
In order to see the logs run
docker-compose logs -f
Example output:
tempea_1  | > [email protected] start /src
tempea_1  | > node index.js | ${NODE_PATH:-node_modules}/.bin/bunyan -o short -l 30
tempea_1  |
tempea_1  | 13:46:38.340Z  INFO tempea: Creating cache controller (controller=cache)
tempea_1  | 13:46:38.349Z  INFO tempea: Creating influx client (controller=database)
influx_1  | ts=2019-01-20T13:46:38.484164Z lvl=info msg="Executing query" log_id=0D6rhs5G000 service=query query="CREATE DATABASE temp"
influx_1  | [httpd] 172.19.0.3 - - [20/Jan/2019:13:46:38 +0000] "POST /query HTTP/1.1" 200 57 "-" "node-superagent/3.8.3" cf5a2162-1cb9-11e9-8018-0242ac130002 6017
tempea_1  | 13:46:38.611Z  INFO tempea: Initializing routing module
tempea_1  | 13:46:38.651Z  INFO tempea: Starting Backend on port 3000
tempea_1  | 13:46:38.678Z  INFO tempea: Starting cron job (controller=schedule)
tempea_1  | 13:46:38.885Z  INFO tempea: Backend listening on port 3000
tempea_1  | 13:47:01.658Z  INFO tempea: Room temperature high enough, disabling heating (controller=heat, currentTemp=19.4, desiredTemp=18, overshoot=0.5)
Grafana
Due to the fact that a InfluxDB is running on the Raspberry Pi Grafana can be used to plot various data.
Docker
The easiest way is to run Grafana as a docker container on your PC
docker run -d -p 3000:3000 grafana/grafana
To access the container open up a browser and enter
http://localhost:3000
The login credentials are
username: admin
password: admin
Add a new data source with the following parameters
Name: tempea
Type: InfluxDB
URL: http://192.168.0.8:8086
Database: temp
Import the tempea dashboard by uploading the Tempea-Dashboard.json from the grafana directory of this project
Select the newly created tempea data source and click Import
Develop
Linux
- Mount the home directory of your Pi on your PC
mkdir raspberry
sshfs [email protected]:/home/pi raspberry
- Clone the project
cd raspberry
git clone https://github.com/eiabea/tempea-api.git
- Change into the project directory and create the secrets folder
cd tempea-api
mkdir secrets
-
Copy the secrets json file from Google into the secrets directory and name it tempea-service.json Obtaining Google Calendar Service JSON
-
Connect to the Raspberry Pi via ssh (username: pi, password: raspberry)
- Change to the project directory
cd tempea-api
- Start tempea in development mode
docker-compose up
Testing
-
Connect to the Raspberry Pi and start the application in development mode like shown in the previous step "Develop"
-
Open up a second terminal and also connect to the Raspberry Pi
- Run the tests with the following command
docker exec -it tempea-api_tempea_1 npm test
Contribute
Every help is appreciated, take a look at the Contributing file.
Tag summary
Content type
Image
Digest
Size
123.7 MB
Last updated
over 7 years ago
docker pull eiabea/tempea-api