linyuxuanlin/tinypng-docker repository overview
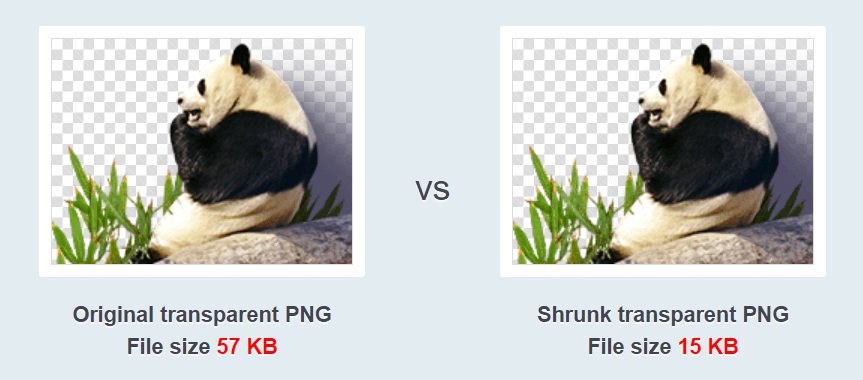
TinyPNG 是一个高质量图片压缩工具,采用智能有损压缩技术压缩 WEBP、JPEG 和 PNG 图片,能有效减少网站带宽占用、流量和加载时间。
部署(docker-compose)
先创建 docker-compose.yml ,并将以下的 ${DIR} 替换为本地的目录(例如 /DATA/AppData);${API} 替换为自己申请的 TinyPNG 密钥:
version: "3"
services:
  tinypng-docker:
    image: linyuxuanlin/tinypng-docker
    environment:
      - TINYPNG_API_KEY=${API}
      - INPUT_DIR=/app/input
      - OUTPUT_DIR=/app/output
    volumes:
      - ${DIR}/tinypng/input:/app/input
      - ${DIR}/tinypng/output:/app/output
配置说明
使用这个 Docker 容器前,你需要先在 TinyPNG 官网上注册一个账户,并申请获取一个 API 密钥。
使用方法很简单,把需要压缩的图片贴进 ${DIR}/tinypng/input 文件夹中,就能在 ${DIR}/tinypng/output 文件夹找到压缩后的图片了。
如果容器无法正常使用,可以用以下的方法排除:
- 确保
docker-compose.yml文件中指定的input和output文件夹路径正确。 - 检查你的 TinyPNG 账户,是否已达到 API 密钥允许的最大压缩次数。
- 检查
input文件夹是否包含正确格式的图像文件(WebP, PNG, JPEG)。注意,此容器只会检测并压缩created事件,因此如果文件已经存在,则需要手动将其移到input目录当中。 - 检查压缩的图片是否在失真度上高于 API 的压缩设置,可能导致 API 解码失败(例如压缩前的图片已经压缩过)。
- 尝试手动使用 tinify 官网提供的 API 压缩工具,上传压缩后的图片以进一步确定问题的所在,同时你可以在控制台输出调试信息定位问题。
开发流程
准备工作
-
在 Docker Hub 上创建一个账户(如果还没有账户)。
-
登录 Docker Hub:
docker login
根据提示输入用户名和密码,登录到 Docker Hub。
创建容器
创建 Dockerfile 文件:
FROM python:3.8-slim-buster

RUN pip install tinify watchdog

WORKDIR /app

COPY . /app

ENV TINYPNG_API_KEY=<your_tinypng_api_key>
ENV INPUT_DIR=/app/input
ENV OUTPUT_DIR=/app/output

CMD ["python", "main.py"]
在相同路径下创建 main.py:
import tinify
import os
import time
import sys
from watchdog.observers import Observer
from watchdog.events import FileSystemEventHandler

class MyHandler(FileSystemEventHandler):
    def on_created(self, event):
        if event.is_directory:
            return None
        elif event.event_type == 'created':
            print("Received created event - %s." % event.src_path)
            source_path = event.src_path
            output_path = os.path.join(os.environ['OUTPUT_DIR'], os.path.basename(source_path))
            compress_image(source_path, output_path)

def compress_image(source_path, output_path):
    tinify.key = os.environ['TINYPNG_API_KEY']
    source = tinify.from_file(source_path)
    source.to_file(output_path)
    print(f"{source_path} compressed and saved to {output_path}")

if __name__ == "__main__":
    print("Watching for new images...")
    event_handler = MyHandler()
    observer = Observer()
    observer.schedule(event_handler, path=os.environ['INPUT_DIR'], recursive=False)
    observer.start()
    try:
        while True:
            time.sleep(1)
    except KeyboardInterrupt:
        observer.stop()
    observer.join()
这里首先导入了必需的 Python 库:tinify,os,time,sys,watchdog。随后定义了一个名为 MyHandler 的类,继承自 watchdog.events.FileSystemEventHandler。这个类包含一个 on_created 方法,当监测到指定文件夹下有新文件被创建时会被调用。on_created 函数获取源图像的路径,并将其压缩到指定的输出路径。最后开始监测输入文件夹,一旦检测到指定文件夹下有新文件被创建,就会自动执行压缩操作,并将压缩后的图像输出到指定的输出文件夹。
编译容器
在 Dockerfile 相同目录下执行:
docker build -t tinypng-docker .
其中,tingpng-docker 为要构建的镜像名称,. 为 Dockerfile 所在的路径。
为镜像打标签
用法:
docker tag <image-name> <dockerhub-username>/<repository-name>:<tag>
例如:
docker tag tinypng-docker linyuxuanlin/tinypng-docker:latest
推送镜像到 Docker Hub
docker push <dockerhub-username>/<repository-name>:<tag>
例如:
docker push linyuxuanlin/tinypng-docker:latest
拉取镜像
上传完成后,其他人便可以通过以下命令拉取镜像:
docker pull linyuxuanlin/tinypng-docker:latest
参考与致谢
原文地址:https://wiki-power.com/
本篇文章受 CC BY-NC-SA 4.0 协议保护,转载请注明出处。
Tag summary
Content type
Image
Digest
sha256:2e1f772a3…
Size
46.8 MB
Last updated
over 3 years ago
docker pull linyuxuanlin/tinypng-docker