nyxtronlab/paperless-aissist
https://github.com/nyxtron/paperless-aissist
10K+
nyxtronlab/paperless-aissist repository overview
Paperless-AIssist
AI document processing for Paperless-ngx that you control, step by step.
Paperless-AIssist lets you decide exactly what runs on each document: tag it with ai-process for the full pipeline, or use step tags like ai-title, ai-ocr, or ai-fields to run only the steps you need.
Run metadata cheaply on local Ollama and reserve a paid vision model for the documents you tag for OCR — text and vision models are configured separately. Works with Ollama (local), OpenAI, Grok (xAI), and OpenRouter.
Features
- Modular tag workflows — run only the steps you need per document (
ai-title,ai-ocr,ai-tags,ai-fields, …), or the whole pipeline withai-process - Separate text & vision models — keep metadata generation on a local Ollama model and reserve a paid vision model for the documents you tag for OCR; each is configured independently
- Configurable prompts — every step is driven by prompts you edit in the web UI, with bundled samples to start from
- Correspondent, document type & tag classification — LLM picks from your existing Paperless metadata
- Decision mode — picks correspondent and document type from your Paperless lists with a probability per answer; an unsure pick leaves the field unchanged and tags the document for review
- Title generation — replaces scanned filenames with meaningful titles
- Custom field extraction — pulls structured data into Paperless custom fields, including optional per-document-type fields
- Vision OCR — uses vision models (Ollama, OpenAI, Grok, OpenRouter) to read documents directly from page images
- OCR post-processing — LLM corrects OCR errors before classification
- Document date detection — updates the Paperless document date when a reliable original date is found
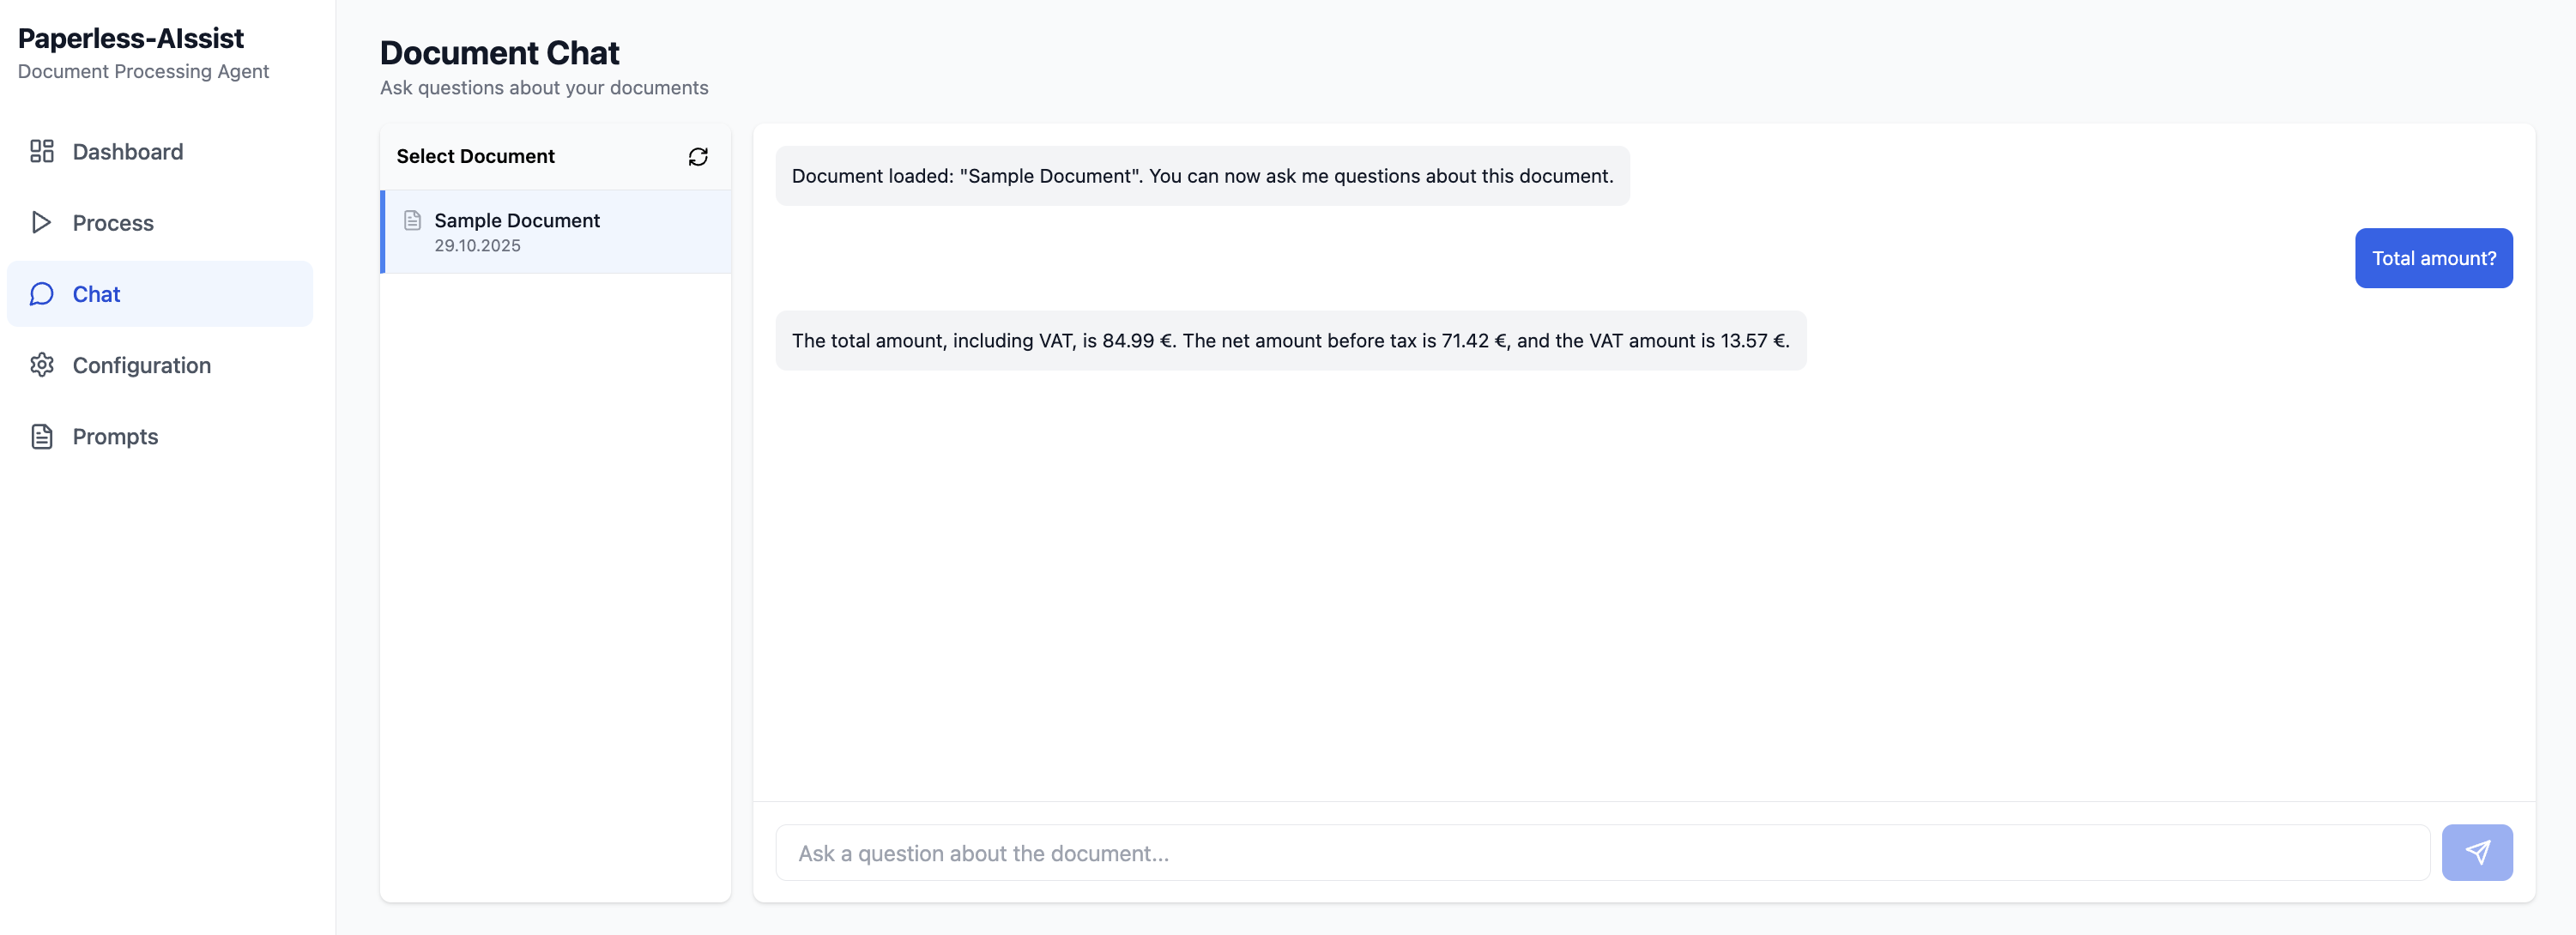
- Document chat — ask questions about any document via the web UI
- Document search & preview — search Paperless documents from the Chat page; preview what AI processing would do without modifying Paperless
- Automation API — trigger, stop, and check processing from cron, Home Assistant, or custom scripts
- Auto-scheduler — polls for new
ai-processtagged documents on a configurable interval - Multilingual UI with dark mode — web interface in English and German; another language is one more JSON file in
frontend/src/locales(same keys asen.json); follows your system theme, with a light/dark switch in the header - Optional authentication — protect the web UI with your Paperless-ngx credentials; disabled by default
Screenshots
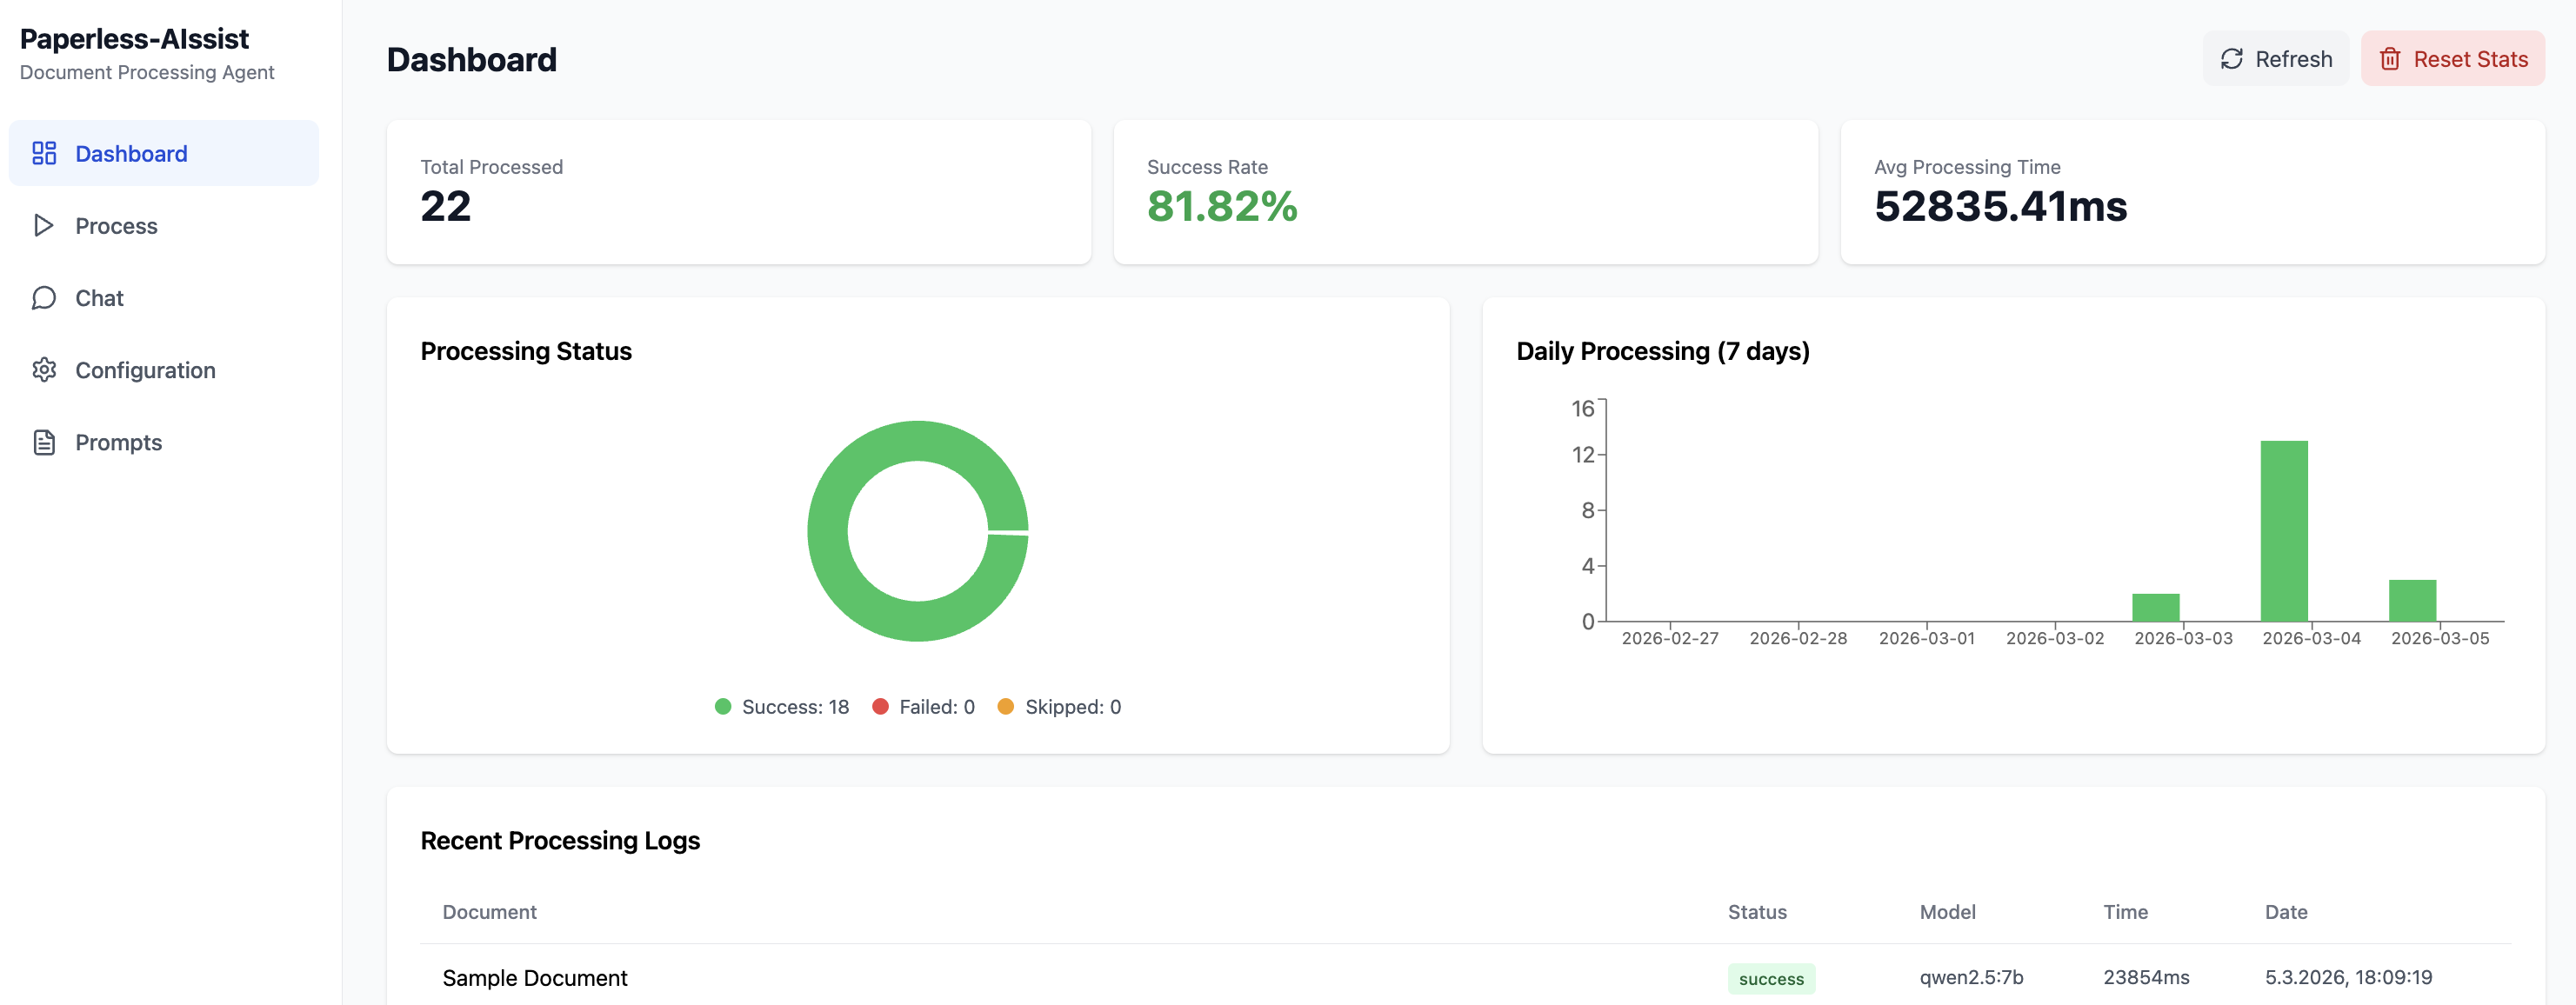
Dashboard
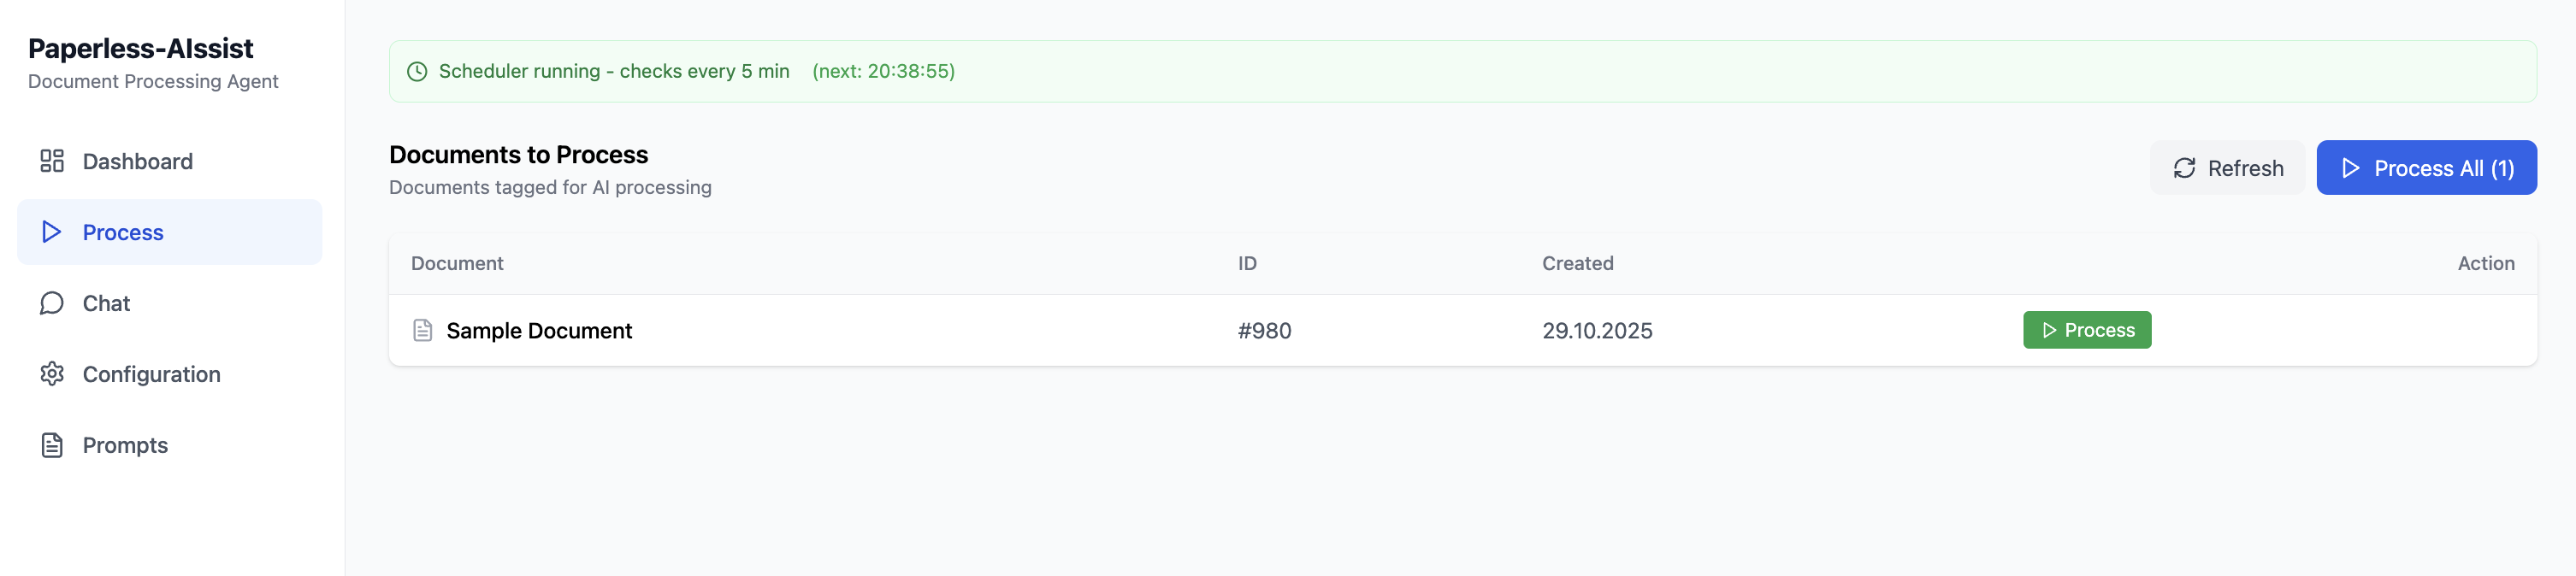
Process Queue
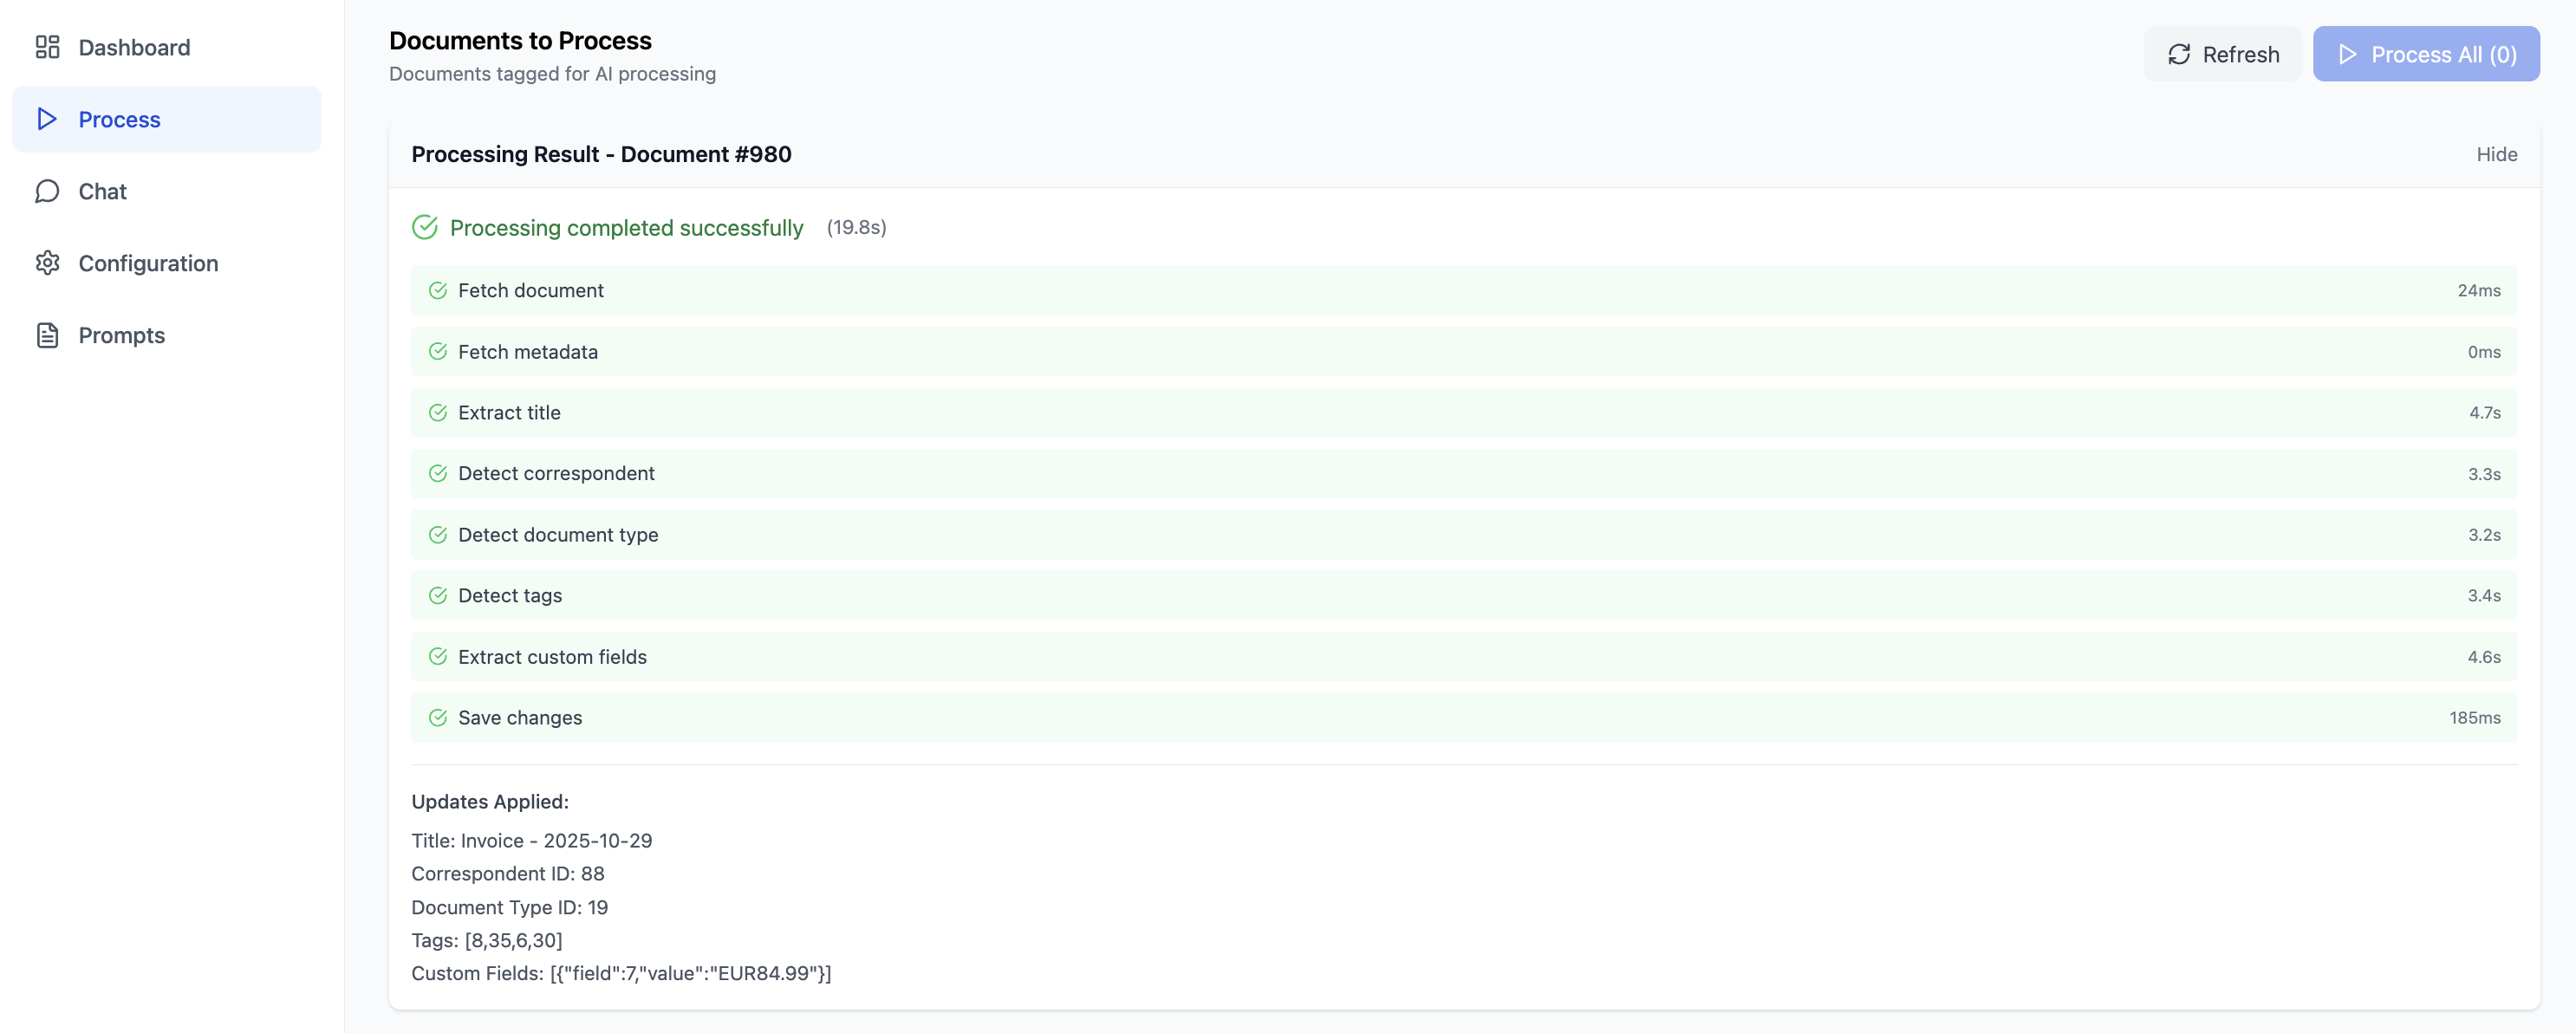
Processing Result
Chat
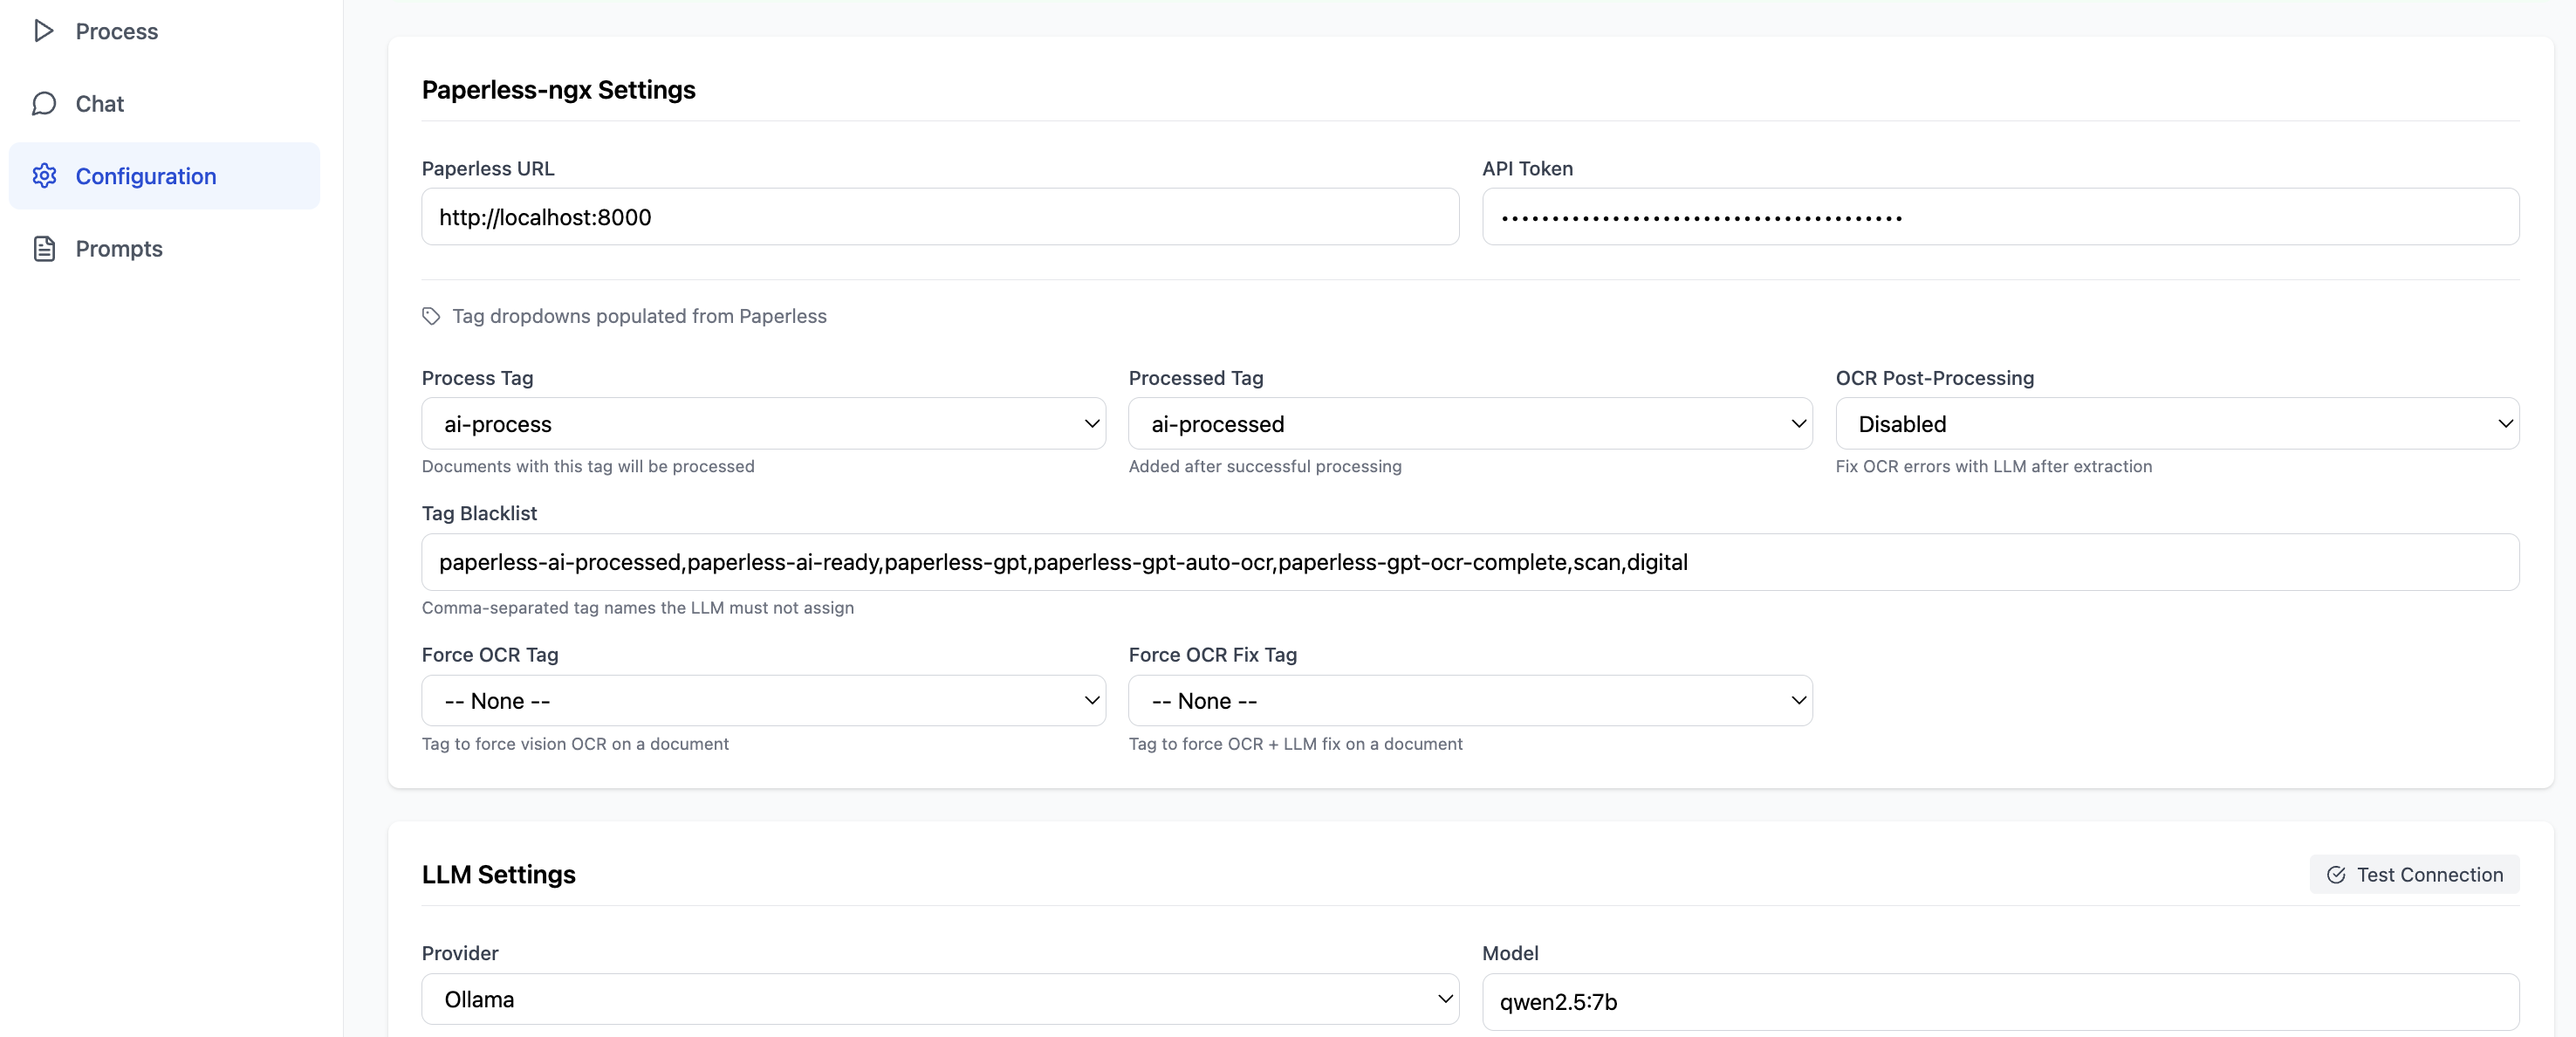
Configuration
Prompts
Quick Start
1. Pull and run
docker run -d \
  --name paperless-aissist \
  -p 8000:8080 \
  -e PUID=1000 \
  -e PGID=1000 \
  -v paperless-aissist-data:/app/data \
  --restart unless-stopped \
  nyxtronlab/paperless-aissist:latest
Open the web UI at http://localhost:8000
The container runs application processes as a non-root user. Set
PUIDandPGIDto match your host user/group (especially on Unraid).
2. Or use Docker Compose
services:
  paperless-aissist:
    image: nyxtronlab/paperless-aissist:latest
    container_name: paperless-aissist
    ports:
      - "8000:8080"
    environment:
      - PUID=1000
      - PGID=1000
    volumes:
      - paperless-aissist-data:/app/data
    restart: unless-stopped

volumes:
  paperless-aissist-data:
Docker Desktop / Mac / Windows: Use
host.docker.internalto reach Ollama on the host. Linux with host networking: Use the host's LAN IP or172.17.0.1.
3. Configure in the web UI
- Go to Settings and verify your Paperless and Ollama URLs
- Set the LLM model (see recommendations below)
- Create at minimum two tags in Paperless-ngx:
ai-processandai-processed. Optionally create modular step tags (see below) for per-step triggering. Before you turn on decision mode, also create the review tagai-review. - Tag any document with
ai-processfor metadata processing using existing Paperless text. For Vision OCR plus metadata processing, add bothai-ocrandai-process.
Configuration
All settings are managed through the web UI and stored in SQLite. No environment variables needed — just mount a volume so your config persists across container restarts:
volumes:
  - paperless-aissist-data:/app/data
LLM Providers
The provider is selected per-model in Settings. Ollama runs locally; OpenAI, Grok, and OpenRouter require an API key. The vision model can use a different provider than the main LLM — configure it separately via llm_provider_vision and llm_api_key_vision (e.g. main = Ollama, vision = OpenAI). Decision mode can also use a model or connection of its own (see Decision Mode below).
| Provider | API Base URL | Notes |
|---|---|---|
| Ollama | http://localhost:11434 | Local — no API key needed |
| OpenAI | https://api.openai.com/v1 | Requires API key |
| Grok (xAI) | https://api.x.ai/v1 | Requires API key |
| OpenRouter | https://openrouter.ai/api/v1 | Requires API key; use provider/model names |
OpenAI-compatible endpoints (e.g. LM Studio, vLLM) also work — set the provider to
openaiand point the URL at your local server.
Generation controls
The main LLM and Vision OCR model each have their own generation settings:
- Temperature controls randomness. Lower values are more deterministic;
0.0–0.3is recommended for document metadata and OCR. - Max Output Tokens optionally limits response length. Leave it empty to use the provider default. For Ollama, this is sent as
num_predict; for OpenAI-compatible providers it is sent asmax_tokens. - Context Window is Ollama-only and maps to
num_ctx. Increase it for large documents, many correspondents/tags, or long prompts. Left empty, Ollama uses its own default, often only 4,096 tokens and not the model's maximum, and cuts a longer prompt without an error. This is different from Max Output Tokens:num_ctxcontrols how much input context the model can see, whilenum_predictcontrols how long the answer may be.
Automation API
External tools can control the same "Process all" workflow that is available in the web UI. This is useful for cron jobs, webhook tools, custom scripts, and Home Assistant RESTful Command automations.
Generate a dedicated token in Settings → Advanced → Automation API. The token is shown once and stored only as a hash.
Use the token as a bearer token:
curl -H "Authorization: Bearer paia_..." \
  http://localhost:8000/api/automation/status
Available endpoints:
| Method | Endpoint | Purpose |
|---|---|---|
GET | /api/automation/status | Current processing state and last automation result |
POST | /api/automation/process/start | Start processing tagged documents in the background |
POST | /api/automation/process/stop | Request stop for an automation-owned processing run |
start is idempotent: if processing is already running, it returns already_running instead of starting a second run. The Automation API token is required even when web UI login is disabled.
The status response includes is_processing, current_document_ids,
active_documents with trigger tags, active step, and runtime. last_result
contains the last completed Automation API run and is null until the first
API-triggered run finishes. A run stopped by a missing review tag (see Decision
Mode below) ends with success: false, and the stopped document's entry in
results names the tag; for ai-process documents last_result.stop holds the
reason as well. Live progress while a run is active is reported via
active_documents.
Home Assistant example:
rest_command:
  paperless_aissist_process_all:
    url: "http://paperless-aissist.local:8000/api/automation/process/start"
    method: post
    headers:
      Authorization: "Bearer paia_your_token_here"
      Content-Type: "application/json"
Recommended Models
Text (LLM)
| Provider | Model | Notes |
|---|---|---|
| Ollama | qwen3:8b | Recommended local — fast, strong multilingual support |
| Ollama | qwen2.5:7b | Lighter option for slower hardware |
| OpenAI | gpt-4o-mini | Fast and cost-effective |
| Grok | grok-3-mini | xAI alternative |
| OpenRouter | openai/gpt-4o-mini | OpenRouter model namespace |
Vision (OCR)
| Provider | Model | Notes |
|---|---|---|
| Ollama | benhaotang/Nanonets-OCR-s:latest | Recommended local — best OCR accuracy |
| Ollama | qwen2.5vl:7b | Good text extraction |
| OpenAI | gpt-4o | Supports native PDF with the official OpenAI API |
| Grok | grok-2-vision-1212 | xAI vision alternative |
| OpenRouter | openai/gpt-4o | Uses page images for portable vision input |
Vision PDF input mode
For the official OpenAI API, Paperless-AIssist can send PDFs natively. For local OpenAI-compatible runtimes such as LM Studio, vLLM, llama.cpp, oMLX, or Ollama's OpenAI-compatible endpoint, use Page images so each PDF page is rendered locally and sent as an image input.
The default Auto mode uses native PDF for api.openai.com and page images for other OpenAI-compatible API bases.
Pull Ollama models before use:
ollama pull qwen3:8b
ollama pull benhaotang/Nanonets-OCR-s:latest
Ollama does not reject a prompt that is longer than its context window. It
keeps the end, drops the start with the instructions and the lists of
correspondents, types and tags, and answers anyway. Paperless-AIssist notices
this and marks the step with a note in the processing view, the chat preview
and the log. When you see it, or when Ollama returns 400 Bad Request for large
documents, increase the Context Window setting in the web UI. It sends
Ollama num_ctx for text and Vision OCR requests and applies from the next
document on, without a restart.
Processing Pipeline
Each document tagged with ai-process runs the standard metadata pipeline using the existing text from Paperless. Vision OCR is intentionally tag-controlled because it is slower and can be more expensive. Add ai-ocr when you want Paperless-AIssist to re-read the PDF with a vision model.
- Title — generates a document title
- Classification — detects correspondent, document type, and tags; in decision mode correspondent and document type are picked with a probability, and an unsure pick leaves the field for review
- Custom field extraction — extracts structured data into Paperless custom fields
- Tag swap — removes whichever trigger tag(s) were present, adds
ai-processed, and in decision mode adds or removes the review tag
Classification only picks from what already exists in Paperless. If you switch on Settings → Advanced → Create New Correspondents, the correspondent step creates one when nothing matches, after a duplicate check against the server. Paperless gives a created correspondent to the API user, so in a multi-user setup nobody else sees it; Owner of New Correspondents lets you pick "Nobody" to make it visible to all users, and Matching for New Correspondents sets the Paperless matching algorithm on it. All three are off by default and only apply to correspondents created from then on.
Modular Tag Workflows
Instead of running the full pipeline with ai-process, you can tag a document with one or more step-specific tags to run only those steps:
| Tag | Triggers |
|---|---|
ai-process | Standard metadata pipeline using existing Paperless text |
ai-ocr | Vision OCR only |
ai-ocr-fix | OCR error correction only |
ai-date | Document date detection and created_date update |
ai-title | Title generation only |
ai-correspondent | Correspondent classification only |
ai-document-type | Document type classification only |
ai-tags | Tag assignment only |
ai-fields | Custom field extraction only |
Multiple step tags can be combined on a single document. All default tag names can be overridden in Settings.
Common combinations:
| Tags | Result |
|---|---|
ai-ocr + ai-process | Vision OCR first, then the standard metadata pipeline |
ai-ocr + ai-ocr-fix | Vision OCR first, then OCR correction |
ai-ocr + ai-date | Vision OCR first, then document date detection |
ai-ocr + ai-ocr-fix + ai-process | Vision OCR, OCR correction, then the standard metadata pipeline |
OCR correction is guarded for long documents. If the document text is longer than OCR Fix Max Chars
(default 10000), the ai-ocr-fix step is skipped and the original document text is kept. This
prevents a shortened LLM result from replacing full multi-page OCR output. The limit can be changed in
Settings → Advanced or with the optional OCR_FIX_MAX_CHARS environment variable.
Legacy override tags force_ocr and force-ocr-fix are still supported for compatibility. For new workflows, prefer ai-ocr and ai-ocr-fix.
Note on
ai-fields+ type-specific prompts: Whenai-fieldsruns withoutai-document-type, the processor reads the document's current document type from Paperless and uses it to match any activetype_specificprompts. You do not need to addai-document-typejust to get type-specific field extraction to work.
ai-date updates the Paperless document date (created_date concept). It does not change when the file was added to Paperless or imported. Low-confidence or ambiguous model results are logged but not written.
Documents tagged with any modular tag are picked up by the scheduler and the process queue alongside ai-process documents.
Up to 3 documents are processed in parallel by default. The limit can be changed in Settings → Advanced → Parallel Documents — set it to 1 for sequential processing on low-power hardware, e.g. when a single machine runs both the vision and text models in Ollama. Each run logs the active limit.
Decision Mode
Correspondent and document type can be decided from the Paperless lists with a probability per answer instead of a free-text reply. Each option gets a letter, the model answers with one letter, and AIssist reads how likely each letter was. Below a threshold (default 0.9) the field stays as it is and the document gets the review tag (default ai-review, create it in Paperless first). A confident "None of these" (at or above the threshold) leaves the field alone and adds the review tag as well. For the correspondent only, with Create New Correspondents on, the normal correspondent prompt names the sender instead and creates it through the usual checks; a name that already exists in Paperless goes to review. With it off, that prompt is still asked once for the sender, and the review note shows the name as a suggestion; nothing is created. A correspondent prompt that may only answer with names from the list never names a new sender, so its note stays without a suggestion. A later run that decides every field with decision mode on takes the review tag off again. A review note also names what else the model weighed, e.g. Also considered: Rechnung 10.0%.
Settings → LLM/Vision → Decision mode. Everything there takes effect from the next document. Each field also has its own question, default Who sent this document (the correspondent)? and What type of document is this?; the letter prompt receives it as {question}, and the Nimble and SystemOne formats send it as the field's description (the <question> below). The decision model can be the main model (leave the provider at Same as main model; only the model name may differ, e.g. nimble on the same Ollama) or its own connection. Test decision model sends a sample question and shows the answer with its probability, or why the text prompt would be used. The section also shows whether the review tag exists: while it is missing, a run stops at the first document that needs a decision, writes nothing to that document and says why on the Process page.
What works: Ollama (any instruct model via letters, nimble via its own format, /v1/systemone when selected), OpenAI (not the reasoning models), LM Studio and vLLM through the OpenAI setting, and the OpenRouter providers that return log-probabilities. Grok does not. Where it cannot work, the field falls back to the normal text prompt and the log says why. SystemOne is asked one question per request: with several questions in one request, the other options colour each answer (measured on Ollama 0.35).
Two list entries that mean the same thing, like a document type Rechnung next to Invoice or one sender under two spellings, cannot be told apart by probability: the model takes the one listed first, often with high confidence. Merge such duplicates in Paperless before you turn decision mode on.
The letter prompts are ordinary prompts on the Prompts page ({content}, {question}, {options}). Nimble's format is fixed: AIssist sends {"context": …, "schema": [{"name": "field", "description": <question>, "choices": [{"code": "A", "value": <option>, "description": <option>}, …, {"code": …, "value": "None of these", "description": "The right answer is not in this list."}]}]} plus Requested field: "field", and Ollama adds the model's own system prompt. The processing log keeps each decision with its probability and the request (without the document text); the chat preview shows the full request.
Measured on 60 documents of a German archive through the app's own preview path with the English defaults, disputed cases blind-judged: correspondent 57/60 right with qwen2.5:7b (letters) and 58/60 with Nimble, document type 56/60 and 55/60. Nimble wrote no wrong correspondent at p ≥ 0.9; qwen2.5:7b did once (a product brand on a shop invoice), so with a 7B letters model keep the review tag on and expect the odd confident miss.
Prompts
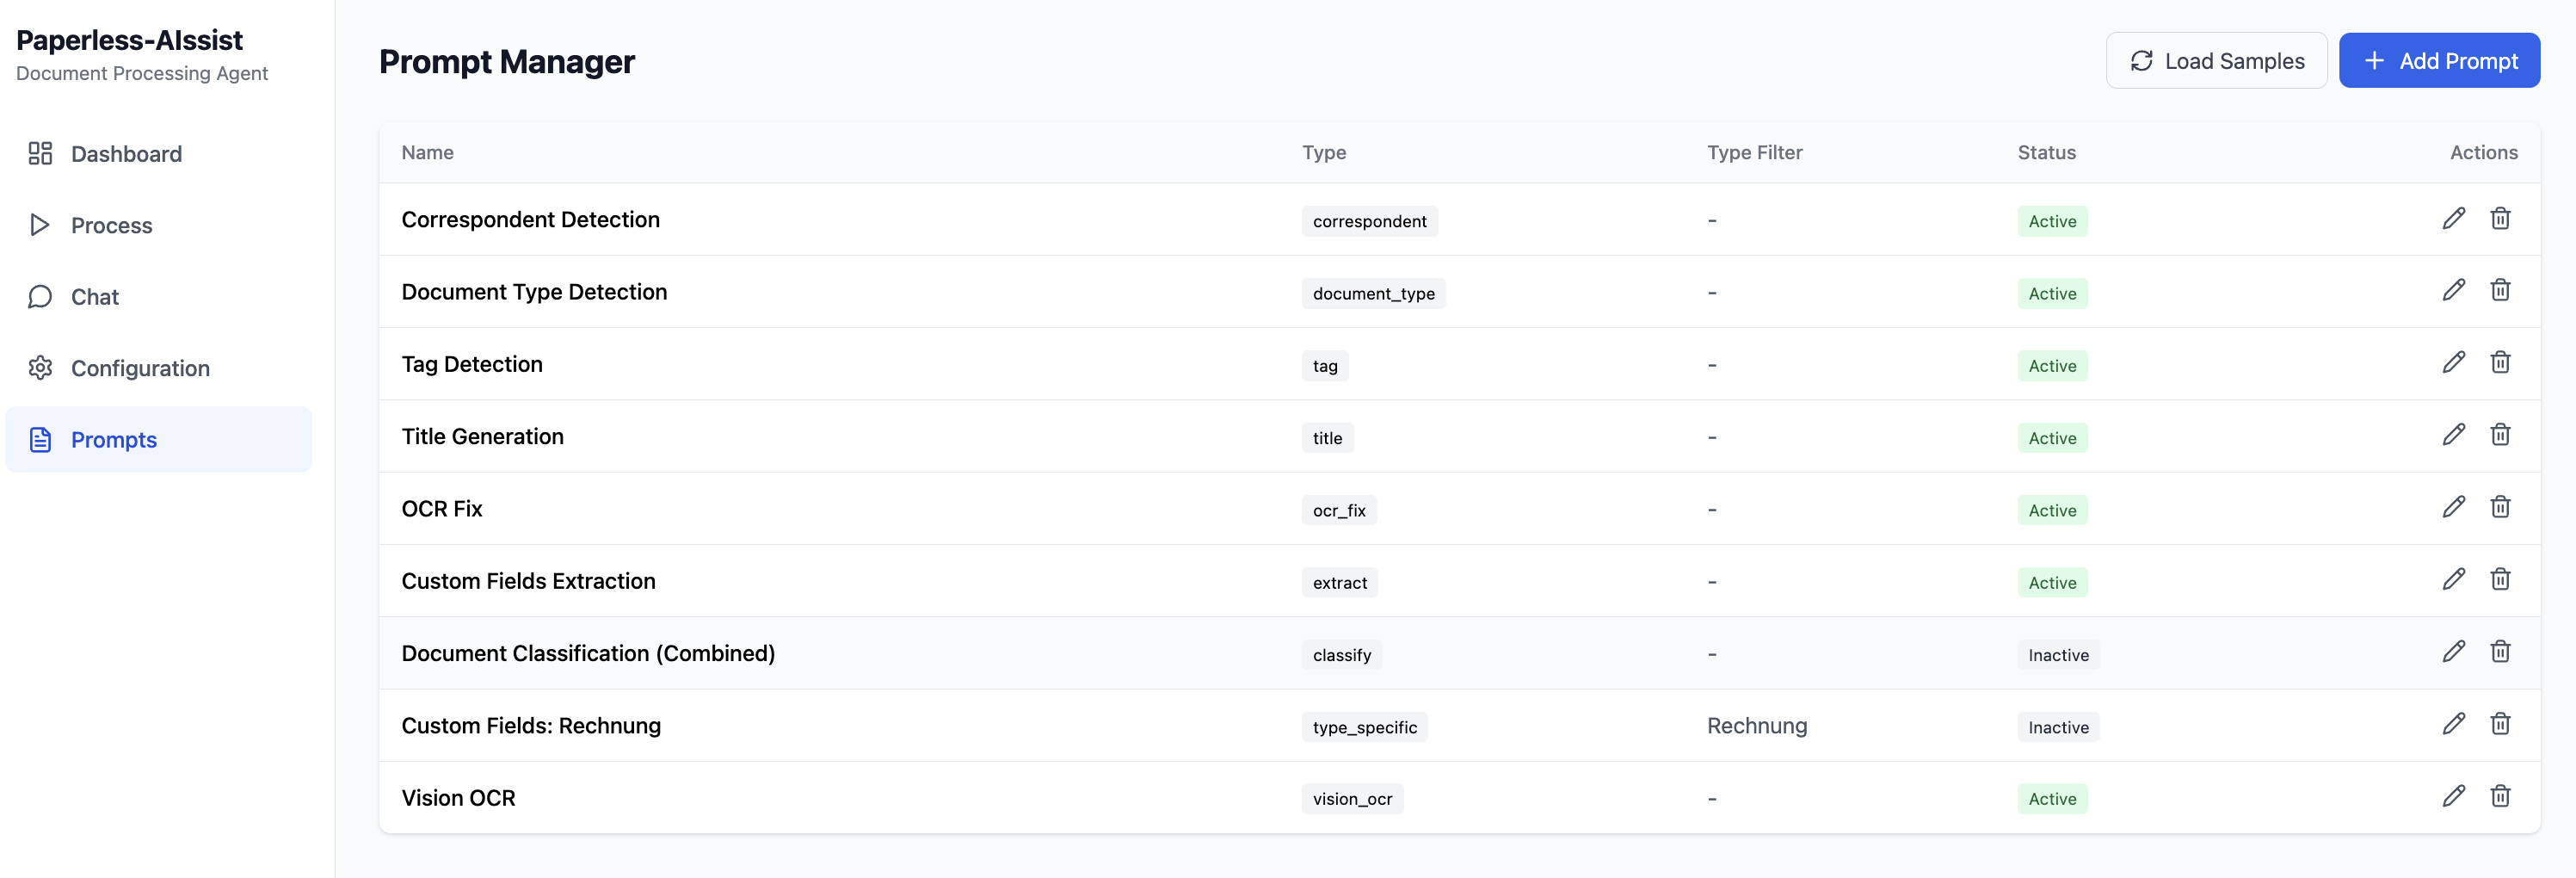
All processing steps are driven by configurable prompts managed in the Prompts page of the web UI.
Prompt Types
| Type | Purpose |
|---|---|
title | Generates a document title |
correspondent | Detects the correspondent from your Paperless list |
document_type | Classifies the document type |
decision_correspondent | Picks the correspondent by letter in decision mode ({content}, {question}, {options}) |
decision_document_type | Picks the document type by letter in decision mode ({content}, {question}, {options}) |
tag | Assigns tags from your Paperless list |
date | Detects the original document date for Paperless created_date |
extract | Extracts custom fields for all documents (expects JSON response) |
type_specific | Extracts custom fields for one specific document type only |
ocr_fix | Corrects OCR errors before classification |
vision_ocr | System prompt sent to the vision model for OCR text extraction. Customise in the Prompts UI; seeded automatically from examples/prompts/vision-ocr.json |
classify | Legacy combined classification — detects correspondent, type, and tags in a single LLM call |
Classification Modes
Individual mode (recommended) — correspondent, document_type, and tag prompts run as separate steps. Use this for best accuracy.
Combined mode (legacy fallback) — a single classify prompt handles all three in one call. Only runs if none of the individual prompts are active.
Custom Field Extraction
Both extract and type_specific can be active at the same time — their results are merged, with type_specific taking precedence on conflicts. This lets you define global fields via extract and add document-type-specific fields via type_specific.
The Document Type Filter on a type_specific prompt limits it to run only when the document is classified as that type. For example: document_type_filter = Rechnung runs the prompt only for invoices.
type_specific requires a known document type to decide whether to run. When the document_type prompt (or classify) is active, it uses the newly detected type. When running ai-fields alone, the processor falls back to the document's existing document type in Paperless — so type-specific extraction works without also adding ai-document-type.
Monetary fields are written the way Paperless stores them: 104,99 € or 1.234,56 EUR becomes EUR104.99 or EUR1234.56, and a bare number takes the field's default currency. A value that is not exactly one readable amount (two numbers, words around it, or 1.679, which could be a thousand or three decimals) is left out with a warning in the log, and the rest of the document is still written.
Prompts see every custom field defined in Paperless via {custom_fields_list}. Use {document_custom_fields_list} instead to offer only the fields already assigned to the document — useful when a Paperless workflow assigns fields per document type and the LLM should not fill anything else.
Load Samples
Use the Load Samples button in the Prompts UI to add any missing built-in sample prompts. Existing prompts are not blindly overwritten during upgrades: unchanged sample prompts can be updated automatically, while edited, legacy, and custom prompts are preserved. The Prompt Manager shows each prompt's sample status, and a single prompt can be replaced manually with its bundled sample from the edit dialog.
Authentication
By default the web UI is open — no login required. You can restrict access to users with a valid Paperless-ngx account.
Enable auth
Set auth_enabled to true in Settings → Advanced (or via the AUTH_ENABLED=true environment variable).
Once enabled, the UI redirects unauthenticated users to a login page. Sign in with the same username/password you use to log into Paperless-ngx.
How it works
- Login proxies credentials to Paperless-ngx (
POST /api/token/) and returns a session token - The token is stored in
localStorageand sent as aBearerheader on every API request - The backend verifies tokens against Paperless on first use, then caches them for 5 minutes
- Logout invalidates the cached token on the backend and clears
localStorage - If Paperless becomes temporarily unreachable, a previously verified token continues to work until the cache expires
API endpoints
| Endpoint | Description |
|---|---|
GET /api/auth/status | Returns {"auth_enabled": true/false} |
POST /api/auth/login | Exchange Paperless credentials for a token |
GET /api/auth/me | Returns the authenticated user info |
POST /api/auth/logout | Invalidates the token in the server cache |
MCP (Model Context Protocol)
Paperless-AIssist exposes an MCP server so you can control document processing directly from Claude Desktop or any other MCP-compatible client.
Enable the MCP server
Enable it in Settings → Advanced → MCP Server — it takes effect immediately, no restart needed. The server is off by default. You can also set the MCP_ENABLED=true environment variable as a fallback.
Once enabled, the MCP endpoint is available at /mcp/ (note the trailing slash) on the same port as the web UI. It uses the streamable HTTP transport, so a persistent connection is not required.
Authentication
All MCP requests must carry a valid Automation API token in the Authorization header. Generate a paia_ token in Settings → Advanced → Automation API — the same token used for the REST Automation API.
Available tools
| Tool | What it does |
|---|---|
list_pending | List documents currently tagged for AI processing |
list_prompts | List all configured prompts |
get_prompt | Get the content of a |
Tag summary
Content type
Image
Digest
sha256:aa8b6c87d…
Size
221.1 MB
Last updated
3 days ago
docker pull nyxtronlab/paperless-aissist