portlatch/portlatch-agent
Expose your homelab from behind CGNAT. WireGuard, no root, no config.
405
portlatch/portlatch-agent repository overview
Portlatch agent
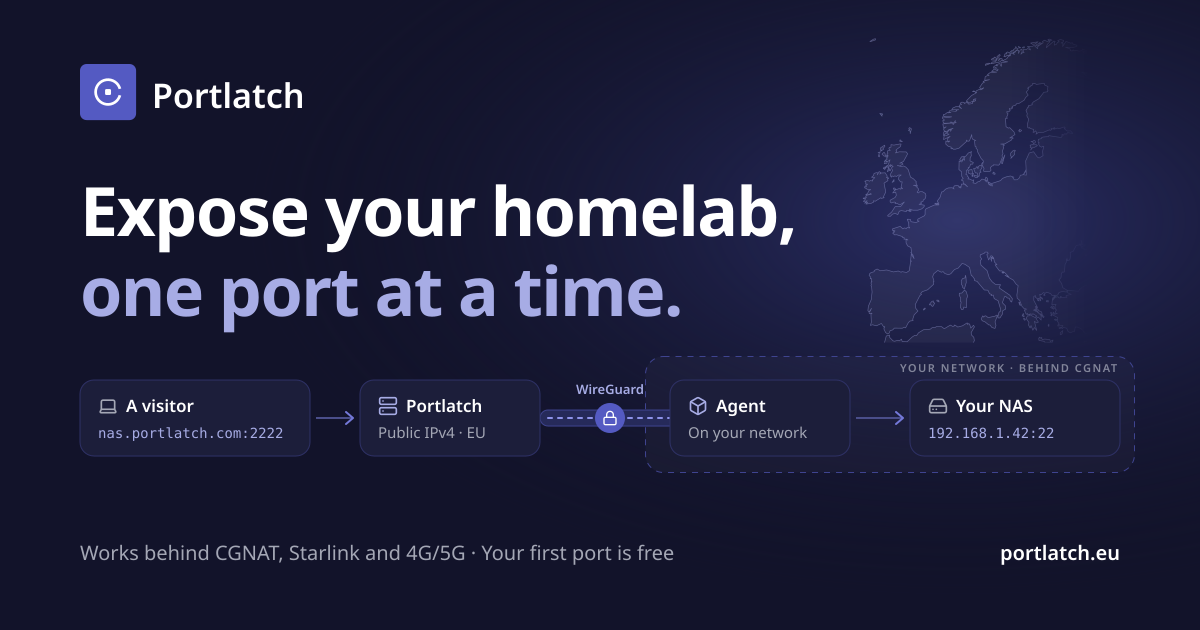
Put your NAS, your Home Assistant or your SSH server online, from behind any connection. CGNAT, Starlink, 4G/5G, DS-Lite, a router you don't control: nothing to open, nothing to configure. Run the agent, approve a code, and your service answers on a public address, still encrypted end to end.
This is the open-source agent that runs on your network. It brings up a WireGuard tunnel to Portlatch, and the first port is free.
- No privileges. WireGuard runs entirely in userspace: no
root, noNET_ADMIN, no kernel module, notuninterface. Nothing changes on the host. - No configuration. No file to edit, no environment variable to set.
- Your keys stay home. The WireGuard private key is generated on your machine and never leaves it.
- We never decrypt anything. HTTPS and SSH stay encrypted from the visitor to your service: the agent only copies bytes.
Running the Docker image
docker run -d \
  --name portlatch-agent \
  --restart unless-stopped \
  -v portlatch:/.data \
  portlatch/portlatch-agent:latest
For linux/amd64, linux/arm64 and linux/arm/v7: Docker picks the right one.
Then read the enrolment code in the logs:
docker logs -f portlatch-agent
  ┌──────────────────────────────────────────────┐
  │  This agent is waiting for your approval.    │
  └──────────────────────────────────────────────┘

    Open   https://portlatch.eu/dashboard
    Enter  3D69XYQ7
Open the URL, type the code, name the machine. The tunnel comes up seconds later.
Running the Linux binary
Without Docker — in a Proxmox LXC container, on a minimal Raspberry Pi — take the archive for your architecture from the releases, then install the binary and its systemd service:
tar -xzf portlatch-agent_linux_*.tar.gz
sudo install -m 0755 portlatch-agent /usr/local/bin/
sudo install -m 0644 portlatch-agent.service /etc/systemd/system/
sudo systemctl enable --now portlatch-agent
journalctl -u portlatch-agent -f
The service runs as an unprivileged user created for it alone, and keeps its
data in /var/lib/portlatch-agent.
Running on Windows
Windows 10 or 11, 64-bit. Take the .zip from the
releases, put
portlatch-agent.exe in a folder where it will stay — the service runs it from
there — then, from an administrator PowerShell:
cd "C:\Program Files\Portlatch"
.\portlatch-agent.exe enrol
The code shows in the window. Once you approve it, the agent installs itself as
a service that starts with Windows; its logs go to
C:\ProgramData\Portlatch\agent.log. .\portlatch-agent.exe uninstall removes
it. The executable is not signed yet: if SmartScreen stops it, choose More
info, then Run anyway.
Updating
Nothing updates the agent behind your back. Your dashboard shows Update available next to an agent once a newer version is out, and older versions keep working in the meantime.
docker pull portlatch/portlatch-agent:latest
docker rm -f portlatch-agent
# then the same docker run as above, with the same volume
With the Linux binary, replace /usr/local/bin/portlatch-agent and run
sudo systemctl restart portlatch-agent. On Windows, run Stop-Service portlatch-agent, replace the .exe, then Start-Service portlatch-agent.
Either way the agent stays enrolled.
What the agent needs from the network
Outbound UDP to the Portlatch server, on the tunnel port — this is what
traverses CGNAT. And outbound HTTPS to the control plane. Nothing inbound.
Behind a corporate network that filters outbound UDP, the tunnel will not come
up. Docker's bridge mode is enough: the agent reaches your LAN through the
host.
What the agent tells us
Every 30 seconds, a heartbeat with three values: the agent version, and the
platform it was built for (linux and amd64, for instance). Nothing about
your machine, your network or your traffic. Each connection it relays is logged
locally, with the visitor's IP address: those logs stay on your machine.
Configuration
Nothing is required.
| Variable | Default | Purpose |
|---|---|---|
PORTLATCH_API_URL | https://portlatch.eu/api/v1 | The control plane |
PORTLATCH_DATA_DIR | .data, so /.data in the image | Where the key and the token live |
PORTLATCH_LOG_LEVEL | info | debug adds the WireGuard logs |
Building from source
Go 1.26 or newer, no cgo:
go build -o portlatch-agent ./cmd/portlatch-agent
docker build -t portlatch-agent .
Website · FAQ · Plans · Security policy
Apache-2.0 — see
LICENSE and
NOTICE. The
licence grants no right to the Portlatch name. Contributions are made under the
DCO (git commit -s).
Tag summary
Content type
Image
Digest
sha256:0b8067069…
Size
4.4 MB
Last updated
about 9 hours ago
docker pull portlatch/portlatch-agent